
Has this ever happened to you? You bring the rotisserie chicken home from the deli and dig in. The meat is moist. The skin is crispy. It's bursting with flavor (although we'd submit it's actually just a lot of salt).
So, you think, I bet I can make this at home and it'll be just as good. You buy yourself a chicken, maybe some veggies. Put it in the pan and set it to roast.
An hour later, you're left with
"Meh... whatever... it'll do. I suppose."
There's no reason to settle when there are delicious recipes out there to try. Recipes like this one from Jason's favorite Ina Garten (dare I say his Would-Be SIK .... "Spouse In Kitchen". Okay, doesn't work quite as well as SAW a.k.a. "Spouse at Work").
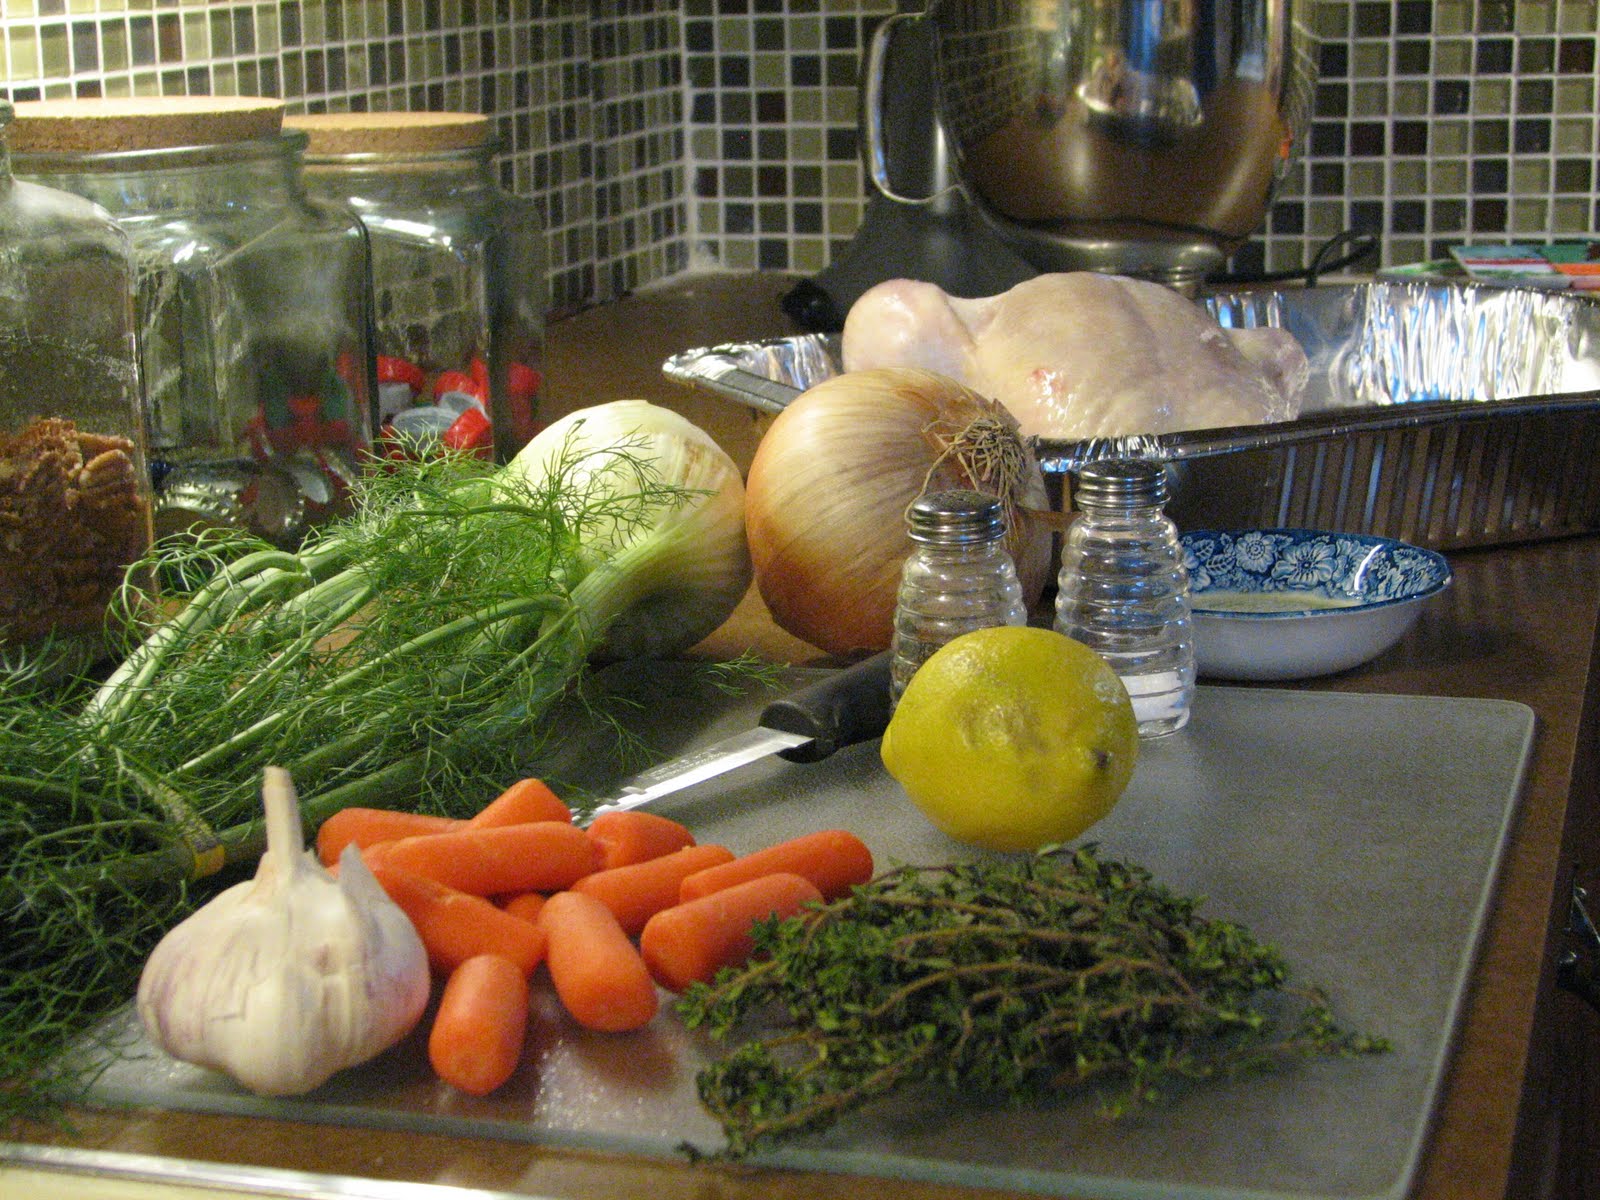
Ingredients:
- 1 (5 to 6 pound) roasting chicken
- Kosher salt
- Freshly ground black pepper
- 1 large bunch fresh thyme, plus 20 sprigs
- 1 lemon, halved
- 1 head garlic, cut in half crosswise
- 2 tablespoons (1/4 stick) butter, melted
- 1 large yellow onion, thickly sliced
- 4 carrots cut into 2-inch chunks
- 1 bulb of fennel, tops removed, and cut into wedges
- Olive oil
Directions
Preheat the oven to 425 degrees F.
Remove the chicken giblets. Rinse the chicken inside and out. Remove any excess fat and leftover pin feathers and pat the outside dry. Liberally salt and pepper the inside of the chicken.
Stuff the cavity with the bunch of thyme, both halves of lemon, and all the garlic.

Brush the outside of the chicken with the butter and sprinkle again with salt and pepper.

Tie the legs together with kitchen string and tuck the wing tips under the body of the chicken. Place the onions, carrots, and fennel in a roasting pan. Toss with salt, pepper, 20 sprigs of thyme, and olive oil. Spread around the bottom of the roasting pan and place the chicken on top.

(yes, we do need to buy a real roasting pan!)
Roast the chicken for 1.5 hours, or until the juices run clear when you cut between a leg and thigh. Remove the chicken and vegetables to a platter and cover with aluminum foil for about 20 minutes. Slice the chicken onto a platter and serve it with the vegetables.

Reviews:
Chef Jason -- I thought it was very good. Very easy to make. Really liked the fennel combined with the chicken and the thyme. The carrots were okay (probably a bit overcooked). We paired it with McManis Cabernet Sauvignon, which was okay for the $9 sale price but probably not worth the $14 regular price.
Tanya -- The flavor is subtler than the salt-and-pepper laden commercial versions. I'm a huge fan of fennel. If you haven't tried it, you must!
Hannah & Olivia -- no comment. They're too busy noshing on their second helping.
Miranda -- Wasn't home, and Jason says "it's a good thing because we all would have gotten less food and the bones would have been scraped dry."
As it is, we have enough left over to simmer it down to a Chicken Stock using this recipe, minus the ginger since we're out. That'll be the base of the Now-Not Vegetarian Chili we're making tomorrow for the Super Bowl.
So, what are the 5 Keys to a Perfect Roast Chicken? (besides a hook to get you to read this post?!?)
1. Salt and pepper the inside of the chicken. If you can, do this early in the day and let it sit in the refrigerator. It will allow the S&P to really sink in.
2. Stuff chicken with great stuff (alternatives to the above recipe include oranges & rosemary, chopped onions & sage, oregano, parsley, whatever piques your interest)
3. Brush the outside of the chicken with butter or olive oil and re-sprinkle (is that a word?!?) with salt and pepper. This will guarantee the crispy skin.
4. Let the chicken "settle" for 20 minutes after you take it out of the oven. This will seal in the flavor and make for easier cutting.
5. Okay, there are only 4 keys. But "5 Keys...." sounds so much better than "4 Keys".
See how easy that was?!?
I have always wondered about how to do this! My mouth is watering by your wonderful descriptions! I love the photos and easy steps. I think I can do this! I am going to try! Thank you!
ReplyDeleteGo for it!! And let us know how it turns out :)
ReplyDeleteHi Tanya -- Thanks for visiting my blog: www.feasteveryday.blogspot.com. I look forward to following yours. And thanks to Anne JP for connecting us.
ReplyDeleteHey Barbara -- Thanks for visiting. I love your blog! (and I love AJP too!)
ReplyDelete