Tuesday, February 14, 2012

Stuffed Peppers circa 1939

Jennifer Reese's new cookbook Make The Bread, Buy the Butter inspired us to actually open some of the vintage cookbooks we inherited years ago from Grandma Ott (a.k.a. Tutu -- grandmother in Hawaiian).

 
This one was published in 1939 and, honestly, I was a little afraid to crack it.  Many years ago, when the kids were young, we were guardians of one of Jason's students - a 17 year old whose parents lived in the Dominican Republic. Adding a nearly grown teenager to our house was quite an adjustment for us (curfews? dating? We were barely out of that territory ourselves!) and for Tom.

One of the most surprising challenges for Tom was food.  The first week he lived with us we made a pot roast. We sat down at the table to eat and Tom just stared at the plate. Finally, he timidly spoke up, "What is it?"

"It's a pot roast! You know, meat, potatoes, carrots, onions... Pot Roast!"

"Um... I've never had one."  He tried it. And liked it (not so much the crawfish we served a couple weeks later.)

But it got me thinking. Maybe we should try to make some Dominican food to ease the transition. I channeled my high school Spanish teachers and wrote Tom's mother a letter. I explained that he was a little homesick, and I thought that making some of her favorite dishes might help.

She wrote back and sent a small cookbook. The first chapter: How to pick and slaughter your dinner.

Um. Yeah. I wasn't going any further.

I guess I assumed Grandma's cookbooks would also take cooking to a level of DIY this former flexitarian wanted no part of. And yes, there are plenty of references to lard (sorry, I know I've lived most of my life in the south, but I just can't get on the lard boat) and too many photos of ring molds (here are some more modern versions with Coke and spinach and - wow! - look at this Hawaiian mold featuring Ahi, Avocado, and Crab. Definitely not your grandma's ring mold!).

But back to our 73 year old cookbook. We also found this gem...

Stuffed Peppers


Ingredients:

  • 6 green peppers
  • 1 cup cooked meat, chopped fine and seasoned (the cookbook suggests that "potted meats that come in cans are excellent for this purpose". Um, yeah, we'll be using ground beef - one pound -  seasoned with a dash of salt and a liberal sprinkling of pepper)
  • 1/2 cup bread or cracker crumbs (make your own... it's easy!)
  • milk or cream (the original recipe doesn't say how much. use enough to moisten, but not soak)
A note: Jason was really skeptical. For him, stuffed peppers has always meant tomato paste and cheese and rice.  He was convinced this dish would be dry and bland. I had to bribe him with promises of Mr. Chen's if the recipe didn't work out. 

Directions: 
  1. Cut off tops of peppers or cut them in two lengthwise. Remove the inner fibers and seeds. Drop into boiling water, remove ("from the fire" ... says the cookbook!), let stand 10 to 12 minutes, then drain. 
  2. Meanwhile, mix the meat with the bread or cracker-crumbs and moisten with a little milk or cream. 
  3. Fill the peppers with the mixture and serve at once or cover with buttered crumbs and set in the oven (400 degrees) for ten minutes to brown. 
We did the browning route and the results were ...

pre-browning
Delicious!  

The girls loved them and Jason ate his words. Thanks Grandma Ott! 

Thursday, February 2, 2012

Rockin' Moroccan Meatballs

Hey, this is Olivia again, and I just wanted to tell you about these ladies...
The Real Housewives of New York
They took a trip recently to Morocco and that inspired me to cook a meal from Morocco for my World of Food Series.  I chose meatballs because they're my favorite thing to make!

Because Mom says recipes from some websites sometimes don't work out so well, I decided to try a recipe from Rachael Ray. She has a TV cooking show. You might have heard of her ;-)  Because I don't really like eggs, I changed her recipe a little (sorry Rachael!).

Ingredients: 

  • 1 tbsp ground cumin
  • 1 tbsp ground coriander
  • 1 tbsp turmeric
  • 1 tbsp paprika
  • 1 1/2 tsp freshly grated nutmeg (we just used the nutmeg that has been in our drawer for years)
  • 1 tsp ground cinnamon
  • 1 tsp ground cardamom
  • 1 tsp ground allspice
  • 1 tsp cayenne pepper
  • 1/2 tsp ground cloves
  • 1 pound ground lamb or beef (We do cow. Can't stand idea of eating a lamb.)
  • 2 slices of good quality stale bread, crusts removed, processed into fresh bread crumbs (or use box bread crumbs)
  • 5 eggs (1 for meatballs, 4 for poaching and serving, optional -- We DON'T do this. I DON'T like eggs)
  • 1 medium onion (1/4 grated and juiced and 3/4 chopped)
  • 4 large cloves of garlic (2 minced or pasted, 2 sliced -- We use garlic out of a jar in the refrigerator)
  • 1 small handful fresh mint leaves, finely chopped (We skip this. Dad hates mint.)
  • pinch ground cinnamon
  • Few grates of nutmeg
  • kosher salt & ground pepper
  • Extra-virgin olive oil
  • 1 small zucchini, sliced on an angle or chopped
  • 1 28-ounce can of diced tomatoes
  • 1 8-ounce can tomato sauce
  • 1 tablespoon honey
  • 1 tablespoon spice blend (Don't worry... we're making the spice blend. Remember all those spices I listed above?!?)
  • 1 14-ounce can chickpeas
  • a handful of chopped cilantro (We skip this, sort of. We use cilantro paste out of a tube in the refrigerator)
  • couscous or bread (We like Naan) to serve with it


Directions


First, make the spice blend. Combine the cumin, coriander, turmeric, paprika, nutmeg, cinnamon, cardamom, allspice, cayenne pepper and ground cloves. Store in a tight container for up to several months.

Preheat oven to 350 degrees F. And get a couple of things ready too. You need a wire cooling rack (the kind you cool cookies on) over a large baking sheet.  Put a large mixing bowl next to it and a smaller bowl of warm water. The water helps your hands from getting all sticky.


In the big bowl, combine the meat, bread crumbs, 1 egg lightly beaten, 2-3 tbsp of grated onion and juice (be careful grating it... I hurt my fingers doing this!), 2 cloves minced garlic, mint, pinch of cinnamon, pinch of nutmeg, salt, pepper and a drizzle of olive oil.


Get your hands wet and roll little meatballs (about the size of a big bubble gum ball) and set them on the wire rack.  Roast the meatballs for 20 to 25 minutes.


Heat more oil in a pan (dutch oven, if you've got one) to medium-high. Add the chopped onions, sliced garlic and zucchini. Cook for 7 or 8 minutes, then add the diced tomatoes, tomato sauce, honey and spice blend. Let it bubble.  Drain the chickpeas and stir them into the sauce.


Remove the meatballs from the oven when they're done cooking and put them in the sauce in the pan.  Serve! (or, if you like eggs - YUCK! - and want to do the rest of the recipe - the egg part - you need to make four dents in the sauce and drop in four cracked eggs. Cover the pot and cook it until the eggs are "poached"... sort of cooked all soft and mushy - again, YUCK!)


SO GOOD! (without the eggs!)


Wednesday, February 1, 2012

USDA Updates Plant Hardiness Zones

Are you planning your vegetable garden already?  We are! We built a raised bed last summer, but never got it filled. Here's Peter the Cat helping with construction...


We're gonna fill it up with beans and tomatoes and herbs and maybe some okra... and ... and... and...  (what are your Must Haves?!?)

We're also planning to do some container gardening using our friend Andy's ingenious plastic tub subterranean watering system.  As you can see, it's a pretty productive!


Andy has promised a guest blog soon to explain his system.

In the meantime, it's good to note that the USDA has just updated its Plant Hardiness Zones.  They've been working on this update for about a decade.  Our zone changed. Yours may have too. You can search by zip code here.

Tuesday, January 31, 2012

Snack Plate Dinner with Zucchini Chips and Roasted Chickpeas

We continue to torture the girls with Snack Plate Dinners.  The first time they were "meh".  Attempt #2 got a "yeah, that's pretty good" from 1/3 of our munchkins (could it be the bacon-wrapped artichokes?!?).

Third time's the charm?


We decided to mix things up a bit, so the regular raw veggies, cheese & crackers, and sliced fruit shared the plate with...


Zucchini Chips (adapted from The Joy of Clean Eating)

Ingredients:
  • 1/4 cup Homemade Breadcrumbs (we used storebought breadcrumbs - Italian style - that we had sitting in the pantry)
  • 1/4 cup grated Parmesan cheese (optional - we opted)
  • 1/8 tsp black pepper
  • heaping 1/2 cup whole wheat flour
  • 1 cup cold milk (original recipe uses oat milk. I'm not sure what oat milk is!  used regular organic 1% milk instead)
  • 1 tsp apple cider vinegar
  • 2 1/2 cups sliced zucchini (about 2 small zucchinis)

Preparation:

  1. Preheat oven to 425 degrees.
  2. In a medium bowl combine breadcrumbs, cheese and black pepper.
  3. In separate bowl add flour, milk and vinegar. Gently stir until combined.
  4. Dip zucchini slices in flour mixture and then dredge in breadcrumb mixture.
  5. Place coated zucchini slices on a baking sheet (We forgot to line ours with tin foil and they sticked like crazy! Make sure to either coat your baking sheet with cooking spray or line it with foil.)
  6. Bake for 30 minutes, flipping the slices over once halfway through cooking, or until browned and crisp.

Our other addition, also found on Pinterest (such an addictive website!), was Roasted Chickpeas (adapted from Chef Pandita).


Ingredients:

  • 2 cups cooked chickpeas (we used them straight out of the can, rinsed and drained)
  • 2 tablespoons olive oil
  • 2 tablespoon of your spice of choice (we used sea salt and a little red pepper)
Directions:
  1. Preheat oven to 400F.
  2. Dry the chickpeas - you want them as dry as possible for roasting.
  3. Toss chickpeas in olive oil.
  4. Place chickpeas on a baking sheet (cover with tin foil), roast for 30-40 minutes, tossing with a spatula occasionally for even roasting. 
  5. Remove from oven, sprinkle with spices and let cool before serving. 


    Sooo... did it his the mark?  Well, unlike Clean Eating's kids, ours girls didn't really like the Zucchini Chips.

    Olivia:  I don't like it. (why don't you like it?) I just don't like zucchini, period! It tastes like dog poop. (no it doesn't!) It's one of the few vegetables I don't like.

    For the record, Jason and I really liked the Zucchini Chips. Cleaned the whole plate and would have eaten more if we'd made more.

    The Roasted Chickpeas? That's where we all, adults included, said "meh".  Which is a bummer because I so wanted these to be a tasty substitute for unhealthy potato chips.

    Saturday, January 28, 2012

    Bacon Breakfast Muffins

    We may talk the talk about eating healthy, but when it comes to breakfast (or "breakfast for dinner") there's nothing better than bacon and eggs. Well, nothing but Bacon Breakfast Muffins!


    OMG!!! How could you not be tempted by these little babies?!  I stumbled upon the recipe a while ago on Pinterest. A delightful little blog called We Are That Family had re-blogged a recipe originally by Martha Stewart.  But I tell you what... you don't need a 'recipe' to make this meal.  It's so easy:

    Step 1: Spray a muffin tin with Pam or similar baking spray. (be sure to do this and do it well! We didn't have much spray left... it made getting the finished muffins out the pan very hard!)

    Step 2: Use a cup (or, if you're like us, a beer tasting glass) to cut circular pieces of bread (wheat makes it healthy! right?).


    Step 3: Line the bottom of each muffin with a piece of bread.


    Step 4: Add bacon. Here's a hint that makes cutting raw bacon easier.


    Step 5: Crack an egg over each ...


    Step 6: Bake at 375 for 20 minutes.  Remove from pan and enjoy!

    A couple of things to know:

    • Spray! You must coat each muffin bottom with enough cooking spray, otherwise it sticks.
    • At 20 minutes your egg may look undercooked. It is not. It's just "glossy" looking. If you add a few minutes "to be sure" (like we did) it will be overcooked.
    • I think the bacon would look more artisan (like Martha's picture at the top) if you twist the ends before cooking, rather than laying them out flat like we did. 
    • You can customize this recipe in so many ways. Chopped ham and cheese like my Facebook friend Deborah. Maybe throw in some veggies? The possibilities are endless! (Hannah says "no! not vegetables!")
    Reviews:

    Hannah - My favorite part of the meal was that the bacon was very, very, very crunchy and that made the eggs taste even better because there was one part where it's soft, but there's one part where it's crunchy that tasted really, really good. Something that I didn't like was the bread. I don't know why. I think it was maybe because it was kinda burnt on the outside, but also it was because where the bacon sat to put the egg in it was all mushy. It was like wet.  I rate this meal 4 out of 5 stars.  It's really good, just like my famous Ruffled Eggs

    Jason - I thought it was excellent. The eggs was cooked a little too long (see note above). Ended up being a little rubbery, but the combination of the bread and the egg and the bacon was excellent.  I think I might wrap the bacon back inside instead of having it jutting out the sides. 

    Tanya - I agree with Jason! The thing about this approach that's better than eggs, toast and bacon on a plate in the traditional way is that the bacon grease actually cooks into and flavors the bread and the egg. Unlike Hannah, I'd love to experiment with veggies in this recipe. Maybe diced zucchini, red peppers, tomatoes... endless possibilities. 

    Sunday, January 15, 2012

    Omani Chicken Tandoori

    When Olivia decides to cook for the World of Food Series we never know what we're going to get. Afghani Kabuli Palou was really good. Belgian Mussels Marinieres and Frites was outstanding.  This meal from Croatia? Ugh!  


    I hate to stereotype, but generally the recipes from established food sites and blogs are the best.  If the webpage's only picture is something like this... 


    Chances are the recipe sucks.  If, however, this is the first thing you see...


    Well, now you've got my attention!


    I was so excited to find Sarah Scoble Commerfield's blog What's Cooking in Your World.  She's doing what Olivia's doing, only at a much expedited pace. (At our rate it's going to take us a couple years to get through all the countries!) She includes a lot of background on the countries, her photos are gorgeous, and, if this meal is any indication, her recipes are great!


    Here's Olivia getting to work on Chicken Tandori (Adapted from Desitwist.com -- haha! Ironically, the website of the heart throwing bear!)


    1 whole Chicken (we used thighs)
    1/2 cup plain yogurt
    4 large cloves garlic, crushed
    1 tsp. salt
    1 tsp. ground turmeric
    1 tsp. Omani mixed spice (recipe below)
    1/2 tsp. ground ginger
    1/2 tsp. cardamom
    1 finely chopped (small) hot pepper or 1/2 tsp. cayenne pepper
    4 Tbsp chopped fresh coriander or cilantro (we skipped this part)

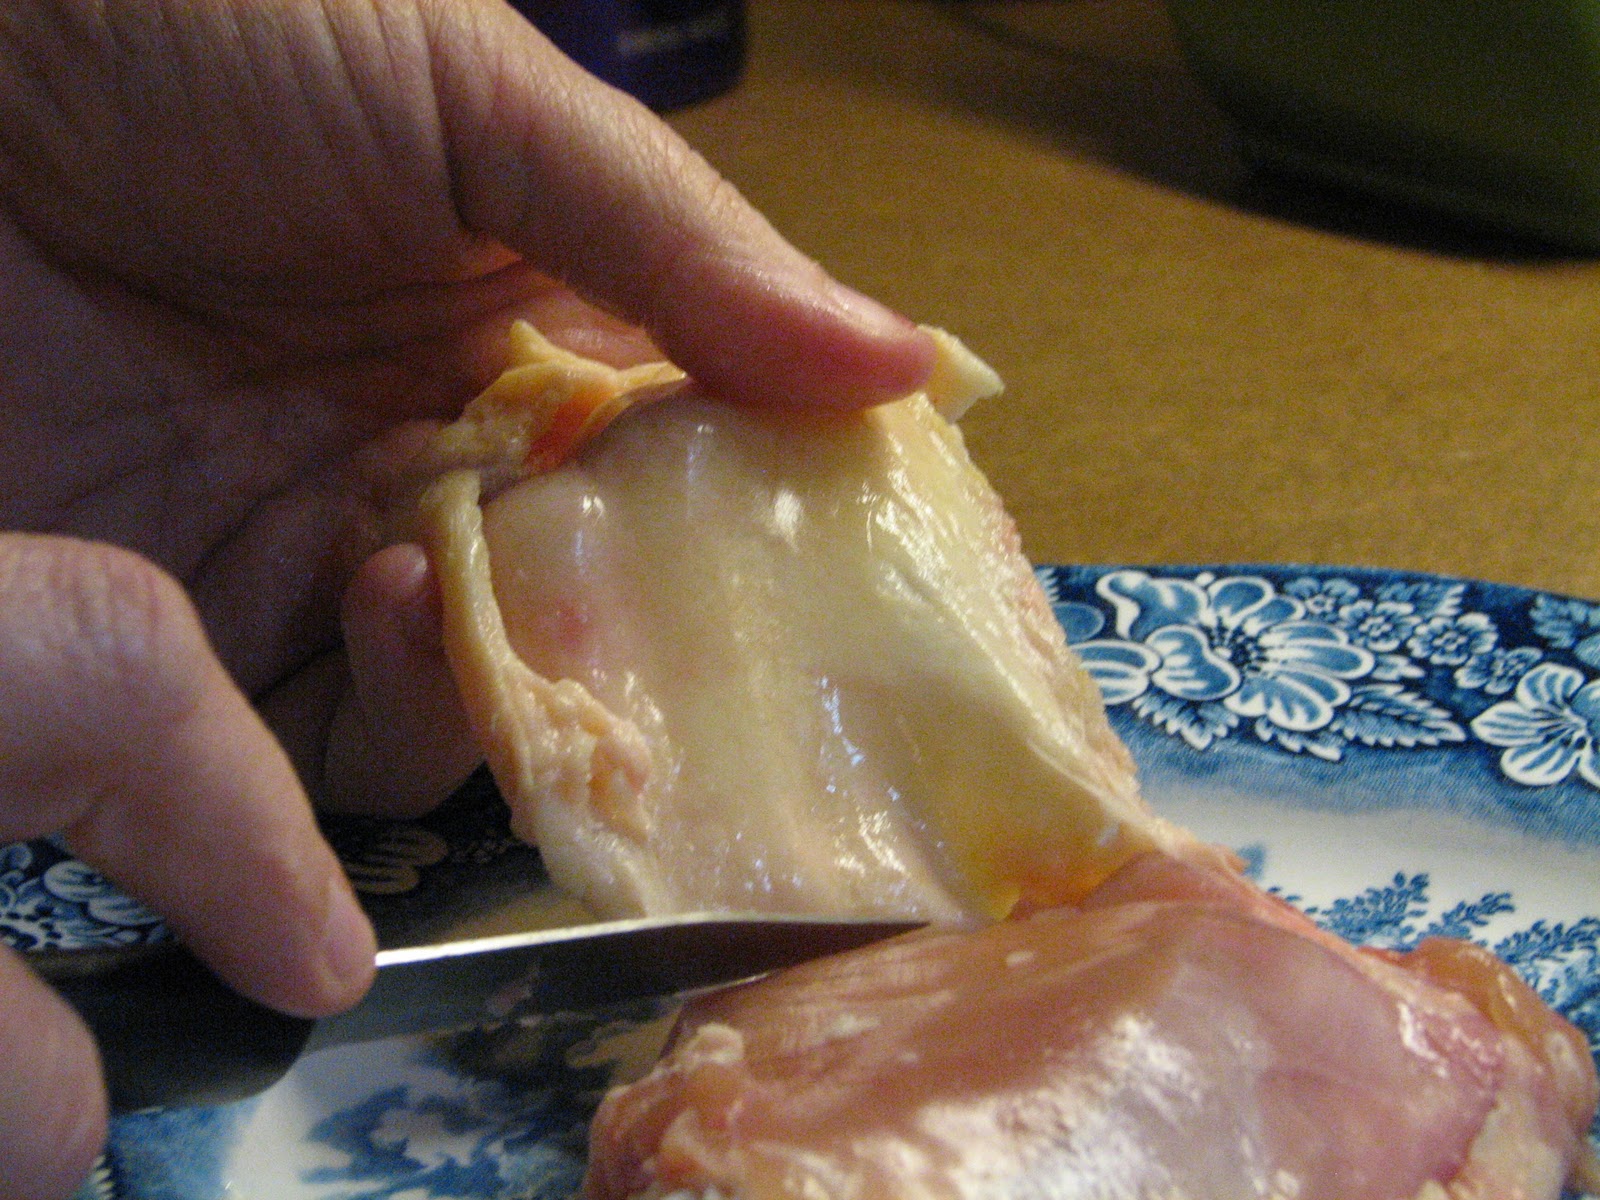
    Skin the chicken and cut into 8 pieces (if using a whole chicken).


    (gosh, my hands look old!)

    In a bowl, mix the chicken with all of the other spices and ingredients, except for fresh chopped coriander.


    Add a few tablespoons of oil to a heavy and heat until oil is good and hot, but not smoking. Place the chicken in the pan bony side down. 


    Sprinkle the fresh coriander over the chicken. (we skipped this part)  


    Cover with lid. Lower the heat to the minimum level and allow to simmer for 50-60 minutes or until the chicken is tender. You may serve chicken as is, or brown it under a broiler for a few minutes (we did).

    Sarah serves hers with Basmati rice and garnish with fresh cilantro.  We served ours with couscous, steamed carrots and fresh blueberries. 

    Omani Spice Mix (Buharat) - (adapted from ehow.com)

    4 tsp. paprika
    4 tsp. black pepper
    1 tsp. ground coriander
    1 tsp. ground cloves
    1 tsp. ground cinnamon
    1 tsp. ground cumin
    1 tsp. ground cardamom
    1 tsp. ground nutmeg
    1 tsp. ground ginger

    Add all the individual spices together in a bowl.


    Place the mixed spices in a covered jar and use for future recipes
    Can be added directly to stews or used as a marinade.


    Hint: Make sure you label your spice mix. We've got a jar full of something - who knows what!?! - in our pantry. It's cinnamon-y smelling, but I'm not sure if it should go in mid-eastern meatballs or french toast! 


    Reviews of Chicken Tandoori


    Jason - I thought it was excellent. Wish there was more chicken.


    Tanya - What he said.


    Miranda - It was good. Spicy, but good. I'm not so much into the carrots.  


    Olivia - It was very good. I thought more chicken would be good. I love couscous and hate carrots. 


    Hannah - (keeps shushing me because she's done eating and is now on to a Criminal Minds marathon. Apparently serial killers trump serial bloggers)

    Tuesday, January 10, 2012

    Make It -vs- Buy It

    If the way to a man's heart is through his stomach, then the way to this woman's heart is through a cookbook! And boy did Jason hit the mark this Christmas. His one present to me (okay, besides a massive remodel of our faux "master" bathroom) was Jennifer Reese's (a.k.a. The Tipsy Baker's) new book "Make the Break, Buy the Butter."  He'd heard about it on NPR and knew I'd love it!


    He was right. From page one, Jennifer has me hooked.  She talks about discovering frozen peanut butter and jelly sandwich (a.k.a. Smucker's Uncrustables).

    "I felt briefly smug in the certainty that I was not so lazy or compromised that I would ever buy mass-produced peanut better and jelly sandwiches. Then I though, People probably once said that about peanut butter. And bread. And jelly."
    That got Jennifer thinking about all the arbitrary lines we all draw on a regular basis.
    "The most irksome decisions I faced as an adult and working mother seemed to be made at the supermarkets.  Fundamentally trivial, they were nonetheless maddeningly fraught, involving questions of time, quality, money, First World guilt, maternal guilt, gender, meaning and health."
     Do you recognize this maddening thought-train?

    "Owen needs cupcakes for school and look, here they are, ready to go, packed in clamshells. Nutritionally irredeemable - but made. Sixteen dollars for twenty-four supermarket trans-fat packed cupcakes? Good grief. I'll bake. That means I need eggs and the eggs here sure are cheap. But I can't buy them here because these eggs are laid by debeaked chickens living in cages the size of Tic Tac boxes. If only I'd gone to the farmers' market on Sunday and bought eggs there.... But how do I know that guy treats his chickens well just because the eggs are blue? And honestly, do I even really care about chickens? I can't believe I'm spending three dollars per pound for these crunchy tomatoes. I should grow them, just like Barbara Kingsolver. How does she find the time to make her own cheese and breed her own heritage turkeys and write books? I need to work harder, sleep less, never watch TV again. Wait, there's high-fructose corn syrup in Campbell's vegetable soup? Isn't that supposed to be a deal breaker?"
     JENNIFER! How did you get inside my head??

    We tried one of her recipes last night: Homemade Spaghetti Sauce.

    Ingredients:
    • 2 tbsp olive oil
    • one onion, sliced thinly
    • 4 cloves garlic, minced (if you're using jarred garlic, that's 4 tsp)
    • 1 tsp red pepper flakes
    • 28 ounces canned crushed tomatoes (we used one with basil)
    Directions:
    1. In large saucepan, heat oil on low. Add onions, garlic and red pepper and saute until onions are softened.
    2. Add tomatoes and simmer on low for 30 minutes.
    3. Season with salt, if necessary (we skipped this step)
    How easy is that? And Jennifer says it's cheaper than storebought (depends, though, on whether you're buying store bought on sale and with coupons like these coupon queens).

    How does it taste?

    Chef Tanya - This is so good we may never buy jarred sauce again (okay, we probably will if it's a BOGO deal). But seriously, this is so easy that if you can boil noodles you can make this sauce. I will cut the red pepper flakes down a bit next time. It was just a touch too spicy for my taste.

    Jason - Agreed!

    Olivia - I really like this a lot. It was a little too spicy. I can't feel my lips. But other than that it's really good.

    Hannah (who, it should be noted, has always refused to eat spaghetti sauce. She agreed to try this when she saw it included her favorite spice - red pepper) - I give it 4.5 stars. I thought it was really good. I don't think it was too spicy. But you know I like things hot.

    Miranda - (Didn't try the sauce. She's still a hold-out, but that's okay. I spent my entire childhood eating large mounds of dry noodles with processed parmesan cheese on it.  Sometimes it takes a while to come around to good food.)